Whether you are a professional crypto trader, serious business person, or a hardcore gamer, the chances are that you are looking to start your own Discord server. Over the last years, Discord has evolved into THE ultimate community tool that is becoming part of more and more lives by the hour.
If you are looking for a guide to create and set up your Discord server, you have come to the right place.
Before we dive into the article, here’s a quick reminder to join our own Neon Internet Discord server and discover some of the features we explain in this article in practice:
Now that we got this out of the way, let’s start with the most important question right up front:
1. “Do you need a discord server?” 🤔
Lately, having your own Discord server and exchanging information with your friends, relatives, or work colleagues is all the rage. Be warned, though, maintaining and managing an active Discord server can be a lot of work. If you are looking for a platform where you and your friends can freely exchange ideas, go ahead.
However, if you are considering a Discord server because you are a company or brand that wants to interact directly with your customers or followers, ask yourself these questions before you get started:
Do I really need a Discord server, and what can I offer the users to keep them active in my community over a longer period?
Because there is nothing worse than filling a server with your fans only to see the activity and sense of community die. Maintaining a Discord server can be a full-time job. And that is not an exaggeration.
2. Discord server setup 🧰
Since this is a Discord beginner guide, we will start right at the very first step. If you want to set up your first server, go to the Discord Website and download the app for your computer. Of course, you could do all of this on a smartphone, but we suggest you use a computer, as it is easier to navigate.
Alternatively, you can use Discord in a web browser version without installing an app.
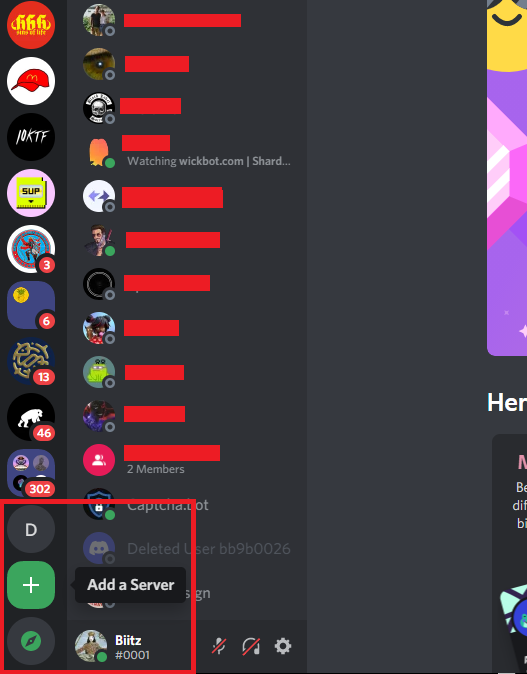
Register a new account, sign in, and you’ll find a green button with a + on the left menu bar.
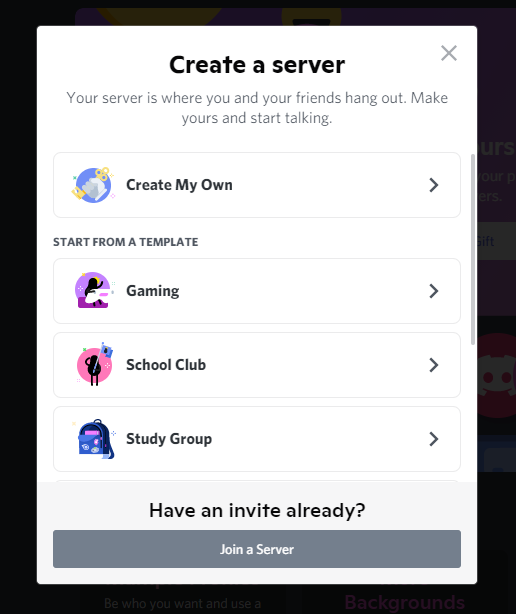
After clicking on it, you’ll be asked what the server will be all about. Depending on what you pick, you’ll get a different template of settings or starting channels. There is no right or wrong here. Pick whatever fits your goal best.
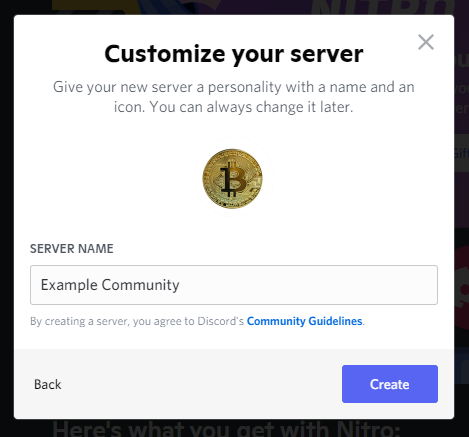
All that is left to do is define a name and server icon. If you are unsure about those, add whatever and edit them later down the line.
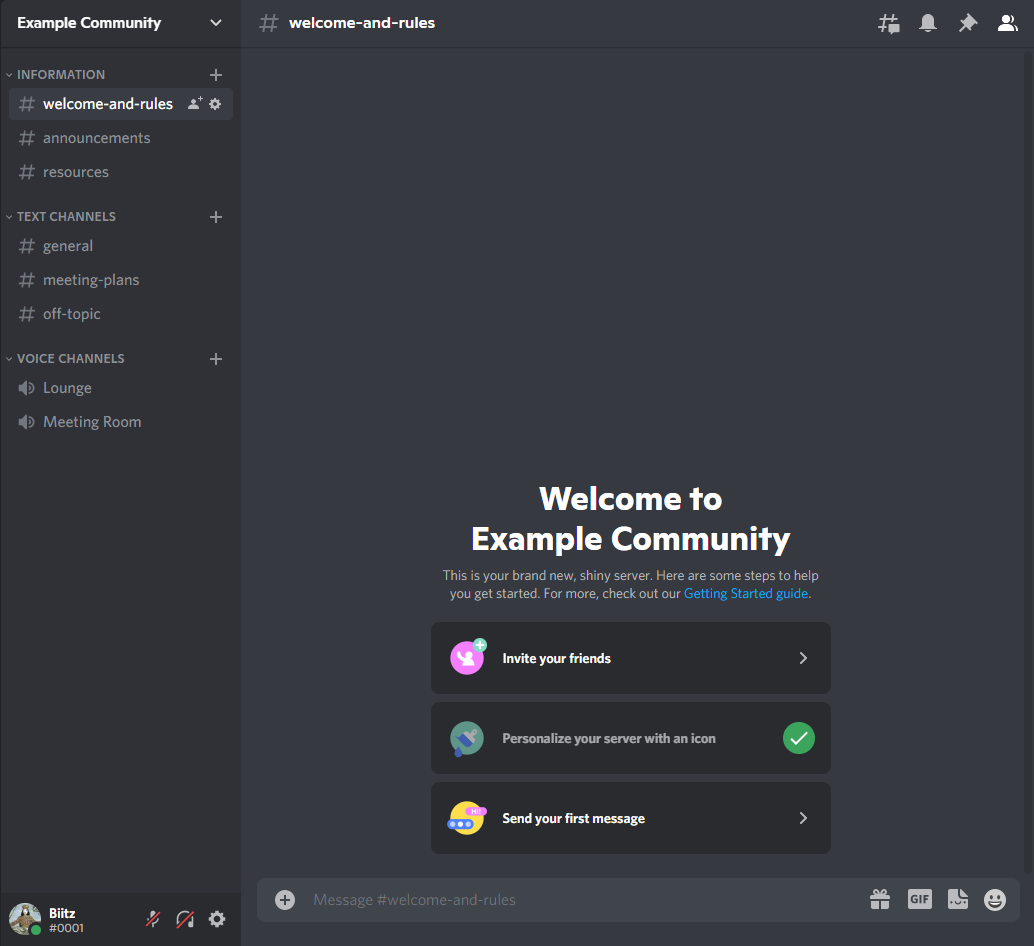
Once you press the create button, your server is live! Yeay we did it.
3. Channel setup🔧
Your next step will be to decide which channels you want to create. If you take a close look, you will see that Discord has already made a couple of channels and categories for you (based on the template you picked earlier).
In this example, categories are Information, Text Channels & Voice Channels, while regular channels are the announcements and resources channels. Categories are typically used to regroup channels that are somehow connected. Either through the users that use them or the content that they contain.
 In this case, we started with the local community template.
There are mainly two different types of channels available to choose from, Text channels or Voice Channels.
You are free to either put all your channels into one big “category” or split them into different categories, based on a specific topic, for example. Here is an example of how we structured our neon.internet Discord server.
 red = categories / green = channels
3.1 Text channels ⌨️
Text channels are similar to “group chats” on other platforms. They are chats where you share messages, pictures, or videos with other users. You can also tag other users by starting with an “@” followed by their nickname (@Biitz, e.g.). This way, they will be notified, and the message gets highlighted for them.
Every channel has its own history, and you can think of them as a place to discuss one specific topic. For example, your general chat is the place for your everyday chatter, while the #book-corner channel is reserved for discussion around interesting books you are reading.

3.2 Voice channels 🎤
On the other hand, voice channels are similar to online meeting rooms. Such as Zoom or Microsoft Teams calls. With the difference that people can freely join and leave those channels (if they have the permission to do so – but more on this later).
It’s like walking into a room with your friends and joining their conversation. You can even host events (stages) where listeners cannot talk. Again, similar to moderated online meetings with speakers and listeners. There is no limit to the number of users in the same call.
3.3 Video streaming 📹
Voice channels have one additional neat feature: Video streaming and screen-sharing. Up to 25 users are able to video-chat simultaneously, and up to 50 people can watch someone’s shared screen.
4. Channel & category settings ⚙️
Right-clicking on the channels or categories will open up a new drop-down menu and many more additional settings.
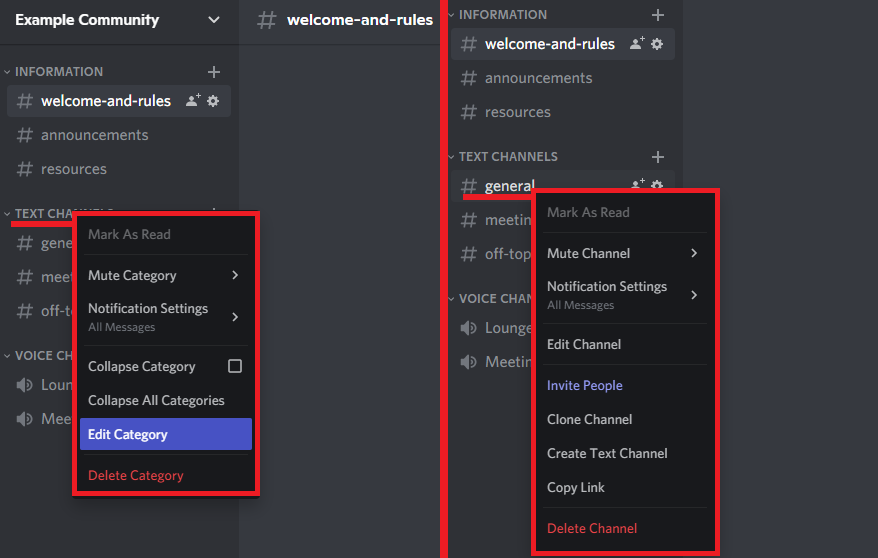
There are many minor adjustments that you can make to your categories or channels, which we will explain in detail here. So take some minutes to click around and see what can or can’t be done for yourself.
4.1 Permissions 🔐
One feature that will be important for most servers is the permissions tab. Permissions define who can see or use specific channels and categories and who can’t. To use this feature, all you have to do is convert your default channel into a private one.
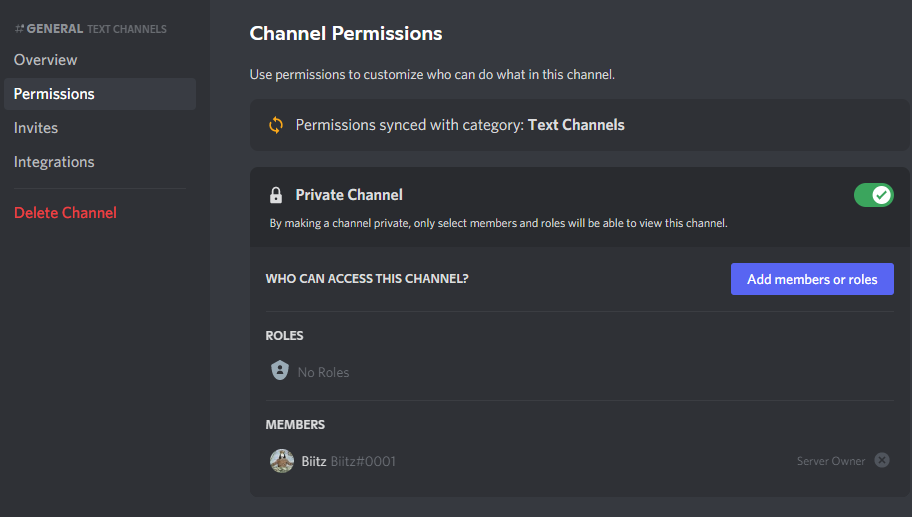
4.2 Member permissions 🔑
Now it is up to you to decide who will see the private channel. Either you choose specific users (that are already on the server), or you can define dedicated roles that will be allowed in this channel. We explain how to define your roles later in this article.
The permission menu has many different settings that can be adjusted. Unfortunately, we cannot tell you which settings you should pick, as this highly depends on the use case and your personal preference. However, there are some settings that you should pay attention to.
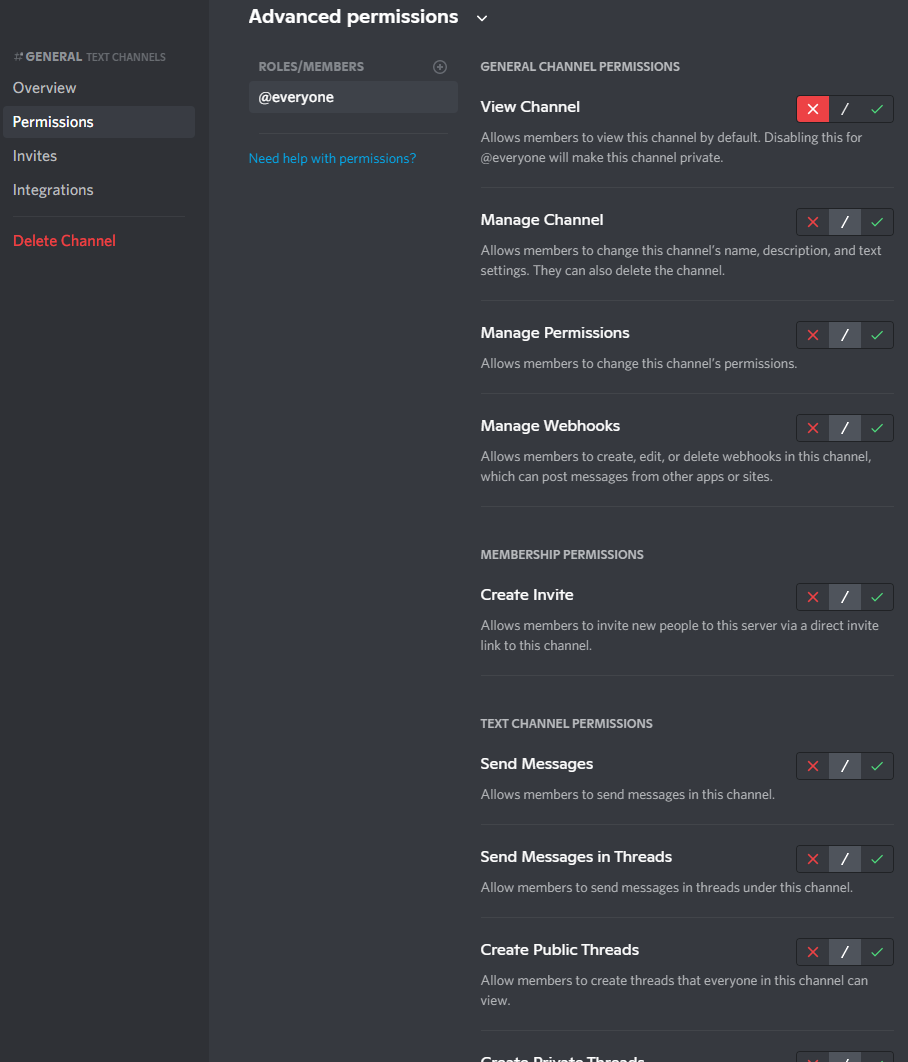
- View channel:
Allows members/roles to view this channel. - Manage channel:
Allows members/roles to change the settings of said channel. - Send messages:
Allows members/roles to write in this channel. - Read message history:
Make sure that this is turned on if you want everybody to see what has been written before joining the channel. - Add reactions:
Usually, you want this to be turned on so that people can react (like/dislike) to your posts.
Important side-note: You can define permissions at three different spots. Either in the category menu, channel menu, or the general server settings. And they CAN interfere which each other. For example, category settings can overwrite channel settings, and server permission might overwrite category permissions. So you have to be very careful and accurate with your settings.
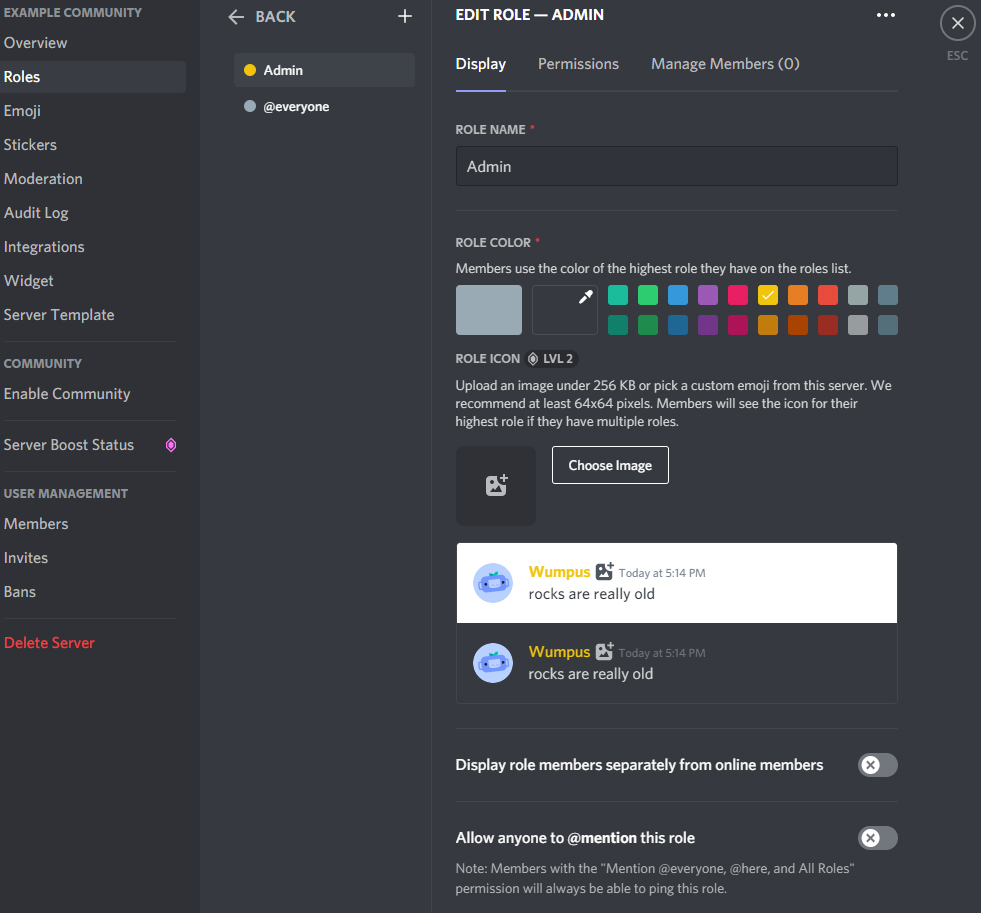
5. Roles 👑
If you plan on having a small group of people on your server, you don’t necessarily need dedicated roles. But if you plan on creating a large open community, roles are fundamental, as they allow you to grant predefined permissions quickly.
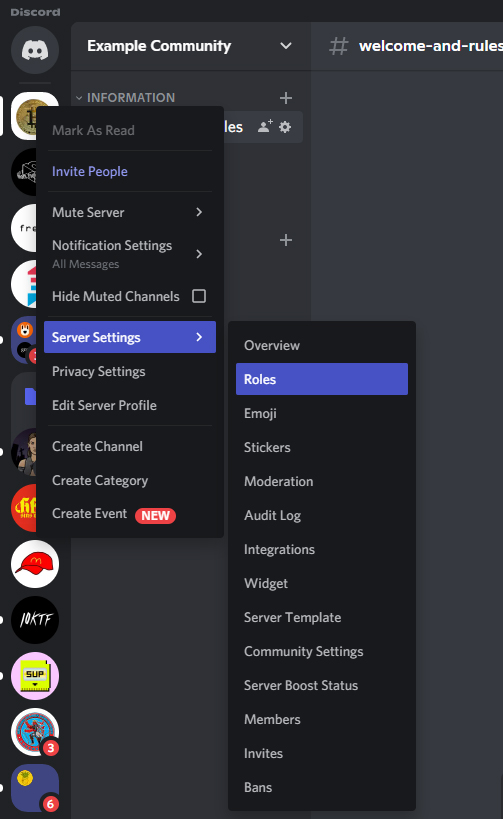 You find the Roles menu in the server settings tab by right-clicking on your server icon.
Once you are in the roles menu, you can start to create as many unique roles as you want. Classic examples would be Member, Staff, Admin, and so on. Simply create a new role and put all the members into this role that should receive those permissions.

Alternatively, you can right-click on the username on the user list and give them the roles directly.
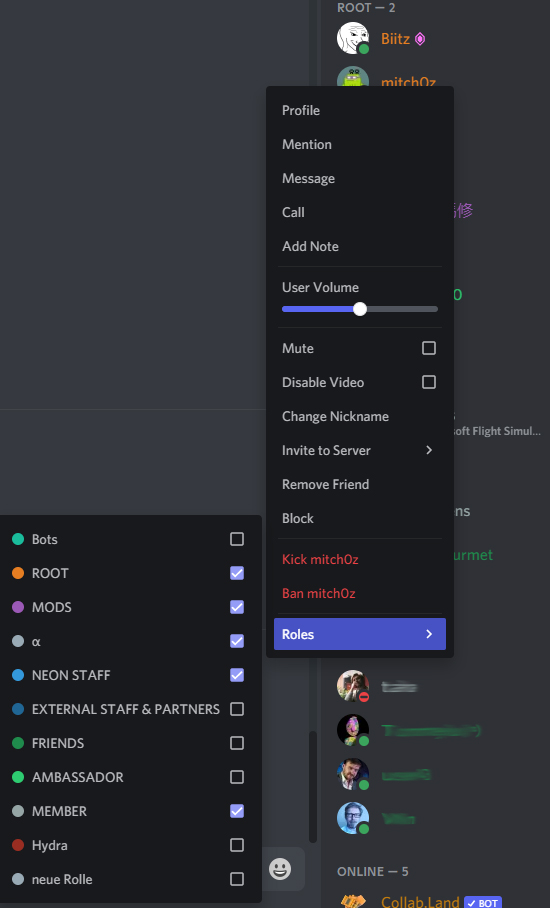
You will also be able to define the default permissions that everybody gets when joining the server. Again, make sure to take the time to set this up properly. If those settings are messed up, people might be able to see content they shouldn’t be able to see, or they maybe don’t see anything at all. The same is true for every other role you are about to define.
Small tip: Ask someone to help you try and check all the permissions before sharing your server with the world.
6. Invite 📧
Now that all the settings are adjusted and channels created, it is time to bring people to your new home. You have the option to either invite Discord Friends directly or copy an invite link and share it with your friends, fans, and followers.
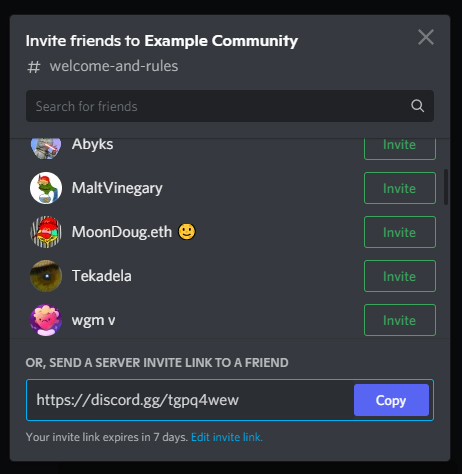 Right-click on the server icon to find the invite menu.
7. Useful gimmicks ✨
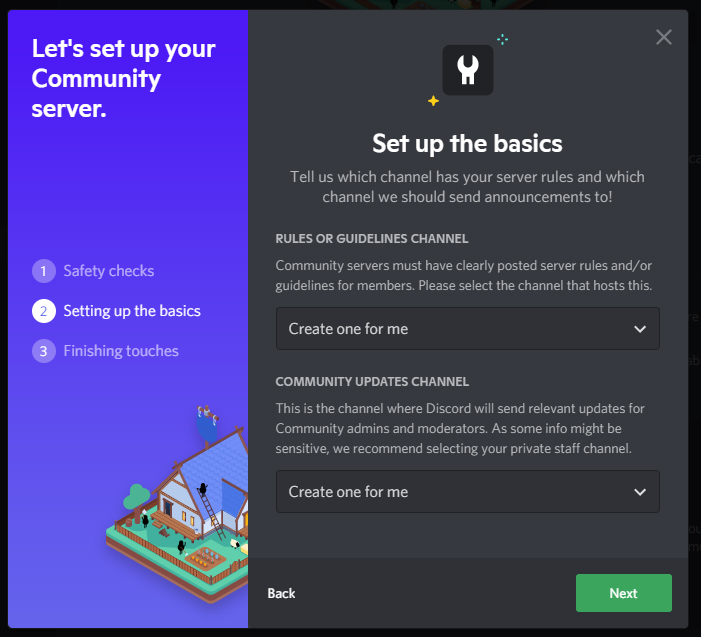
7.1 Community server 🤝
Converting your regular server into a community server grants you access to additional administrative tools to help you grow your server. BUT this also means that you have to abide by different rules and standards.
7.2 Custom emojis 🤪
Discord also allows you to add custom emojis to your server. All you have to do is find the designated tab in the server settings, upload the images and define an alias for them.
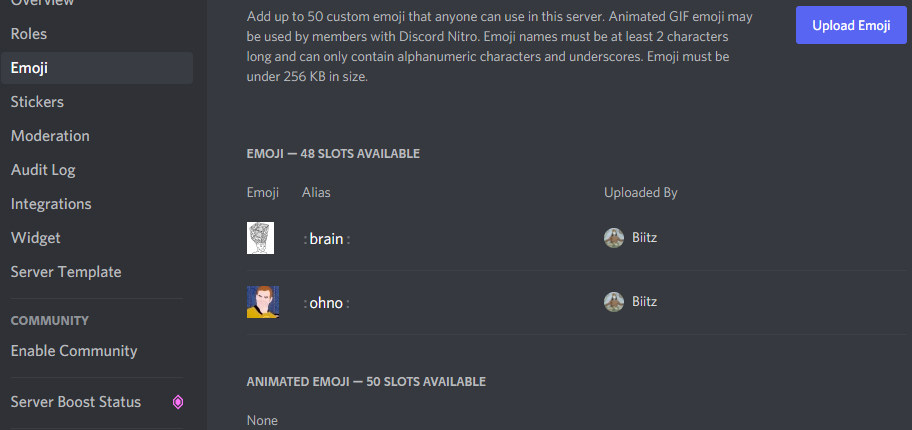
You can find thousands of emojis for free all over the internet. One good place to start is Emoji.gg, as they offer tons of classic emojis but also new and niche ones. Also, since reacting to posts is a significant feature on Discord servers, custom emojis are an absolute MUST at some point.
7.3 Discord Nitro 🧨
Discord Nitro is a premium subscription, so to say. However, it primarily grants you as a user more features, such as different profiles for each server, animated avatars, Nitro stickers, etc.
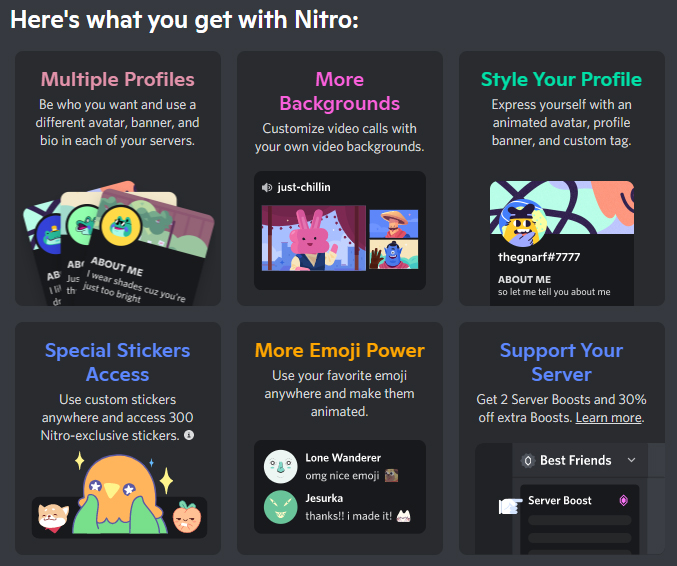
On the other side, Nitro also allows you to boost Discord servers that you are a member of, giving this server more features. To be precise, you will get 2 (monthly) boost tokens with your subscription that you can use on any server you want.
7.4 Server boosting 🚀
Server boosting allows the server to progress towards a higher level. Each level gives the entire server a new set of perks and features. You can buy as many server boosts as you like, but be aware that it is on a monthly or yearly basis and gets expensive quickly. This feature is not meant to be carried by one person, but rather many small contributions of the whole community.
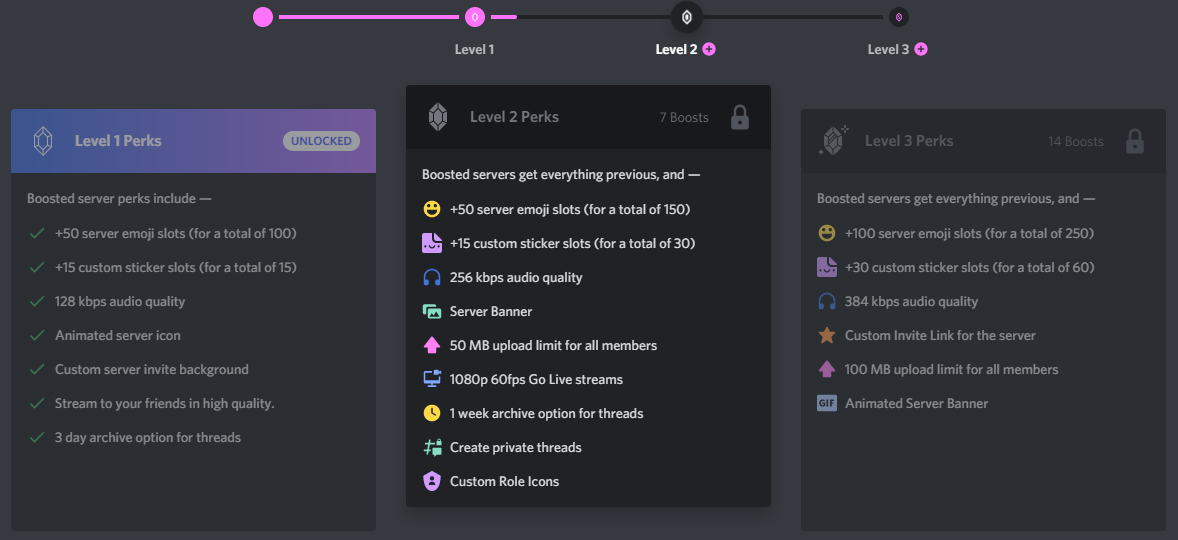
Before you buy Nitro or Boosts, have a close look at the features and see for yourself if they are worth it to you since none of this is necessary.
8. Web3 features & Bots 🤖
Once you click through all the settings and options that Discord offers you, you will quickly realize that there is more potential than initially thought. To tap into the full potential of Discord, you will need the help of bots. There are bots for literally every use-case you could come up with.
Bots that stream music to your voice channels, bots that help you moderate your server, live information on events or stock prices, … you name it!
A great website to start digging around and finding your first bot is Top.gg. Setting up bots can be either very difficult or super easy, depending on the bot and the features that you are looking for. Unfortunately, it would be beyond the scope of this article to delve further into this matter. But rest assured, we are working to help you with this request.
If you are looking for a bot that helps you connect your Discord with Web3 features, Collabland might be the best place to start.
Conclusion
Discord Servers are a potent community-building tool. There are not many alternatives that are so versatile and theoretically completely free. However, even though it’s an effortless and straightforward way for users to interact, it can be a lot of work for you. You can’t assume that people will just come and be active on your server if nothing is to gain.
An inactive and empty Discord server is not a nice image to the outside world and, in our opinion, better to avoid. So the motto to follow is, better not to have a server than have an inactive one.